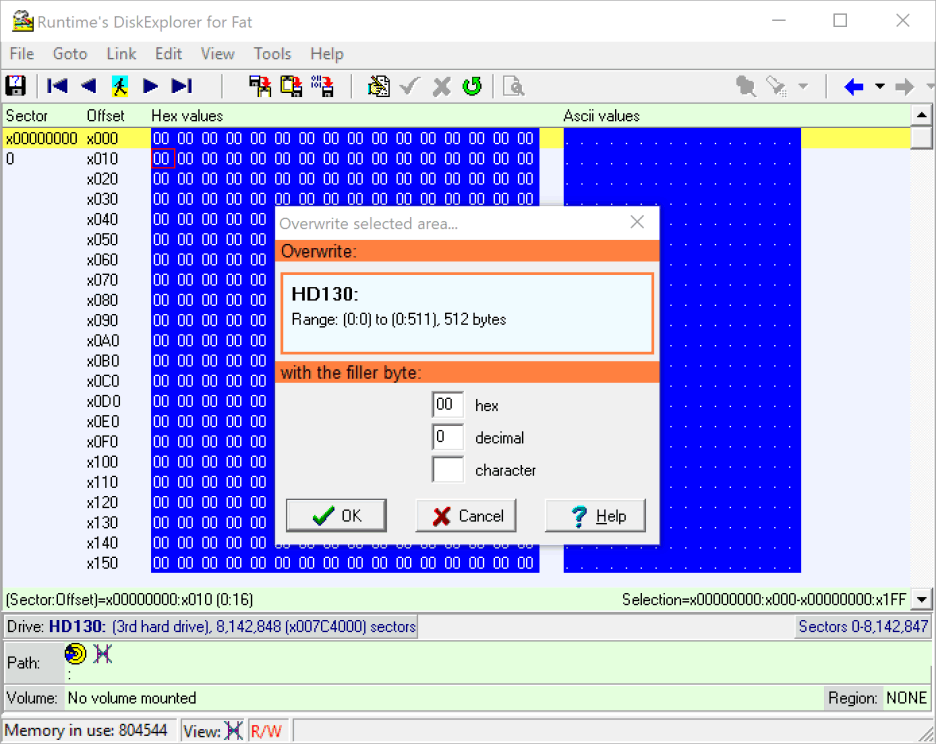
Overwriting Sector 0 With Zeros
Clearing the first sector of a drive will make the Operating System (Windows) release its write-protection on that drive. This is important if you want to write an image back to a drive.
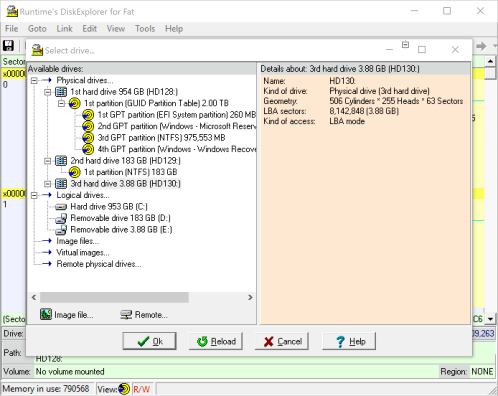
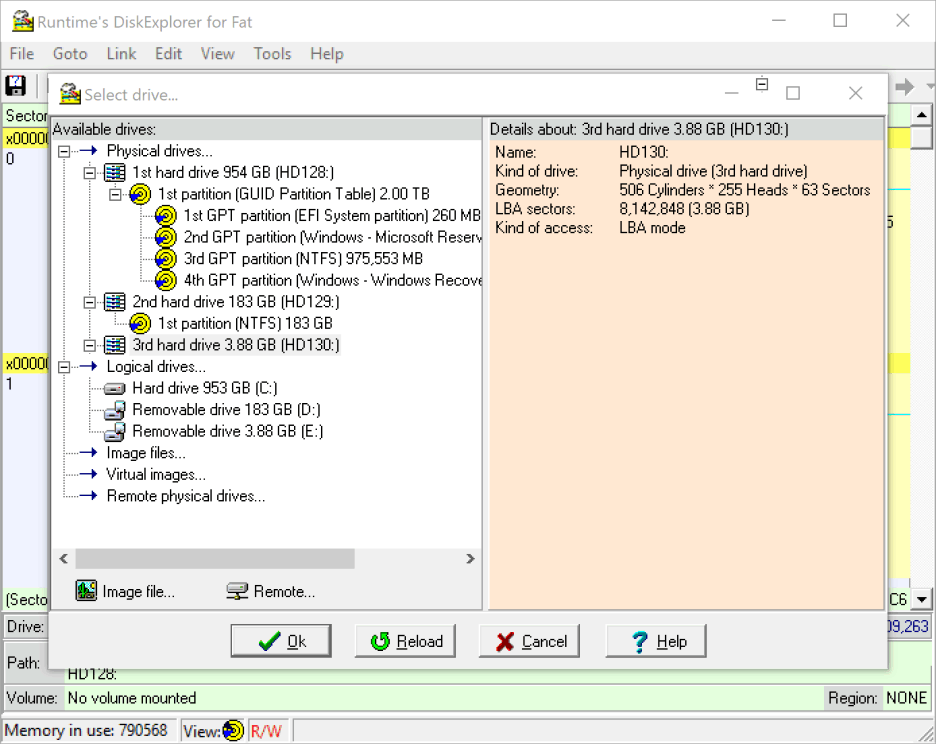
In the following example, we will clear sector 0 of a 4 GB USB stick. The 4 GB target drive is plugged into a USB port and recognized by DiskExplorer as 3rd drive (HD130).
Warning The procedure described below is intended to be used by careful and experienced users. Writing directly to a drive can cause data loss and system corruption.
1 Startup DiskExplorer
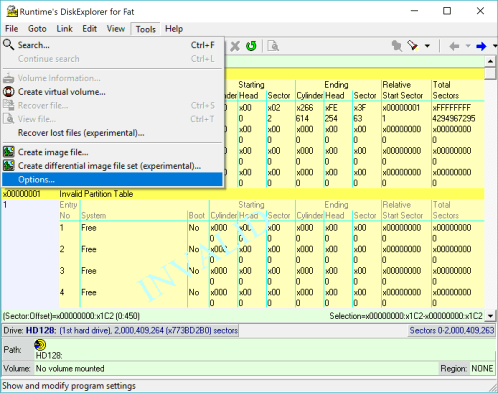
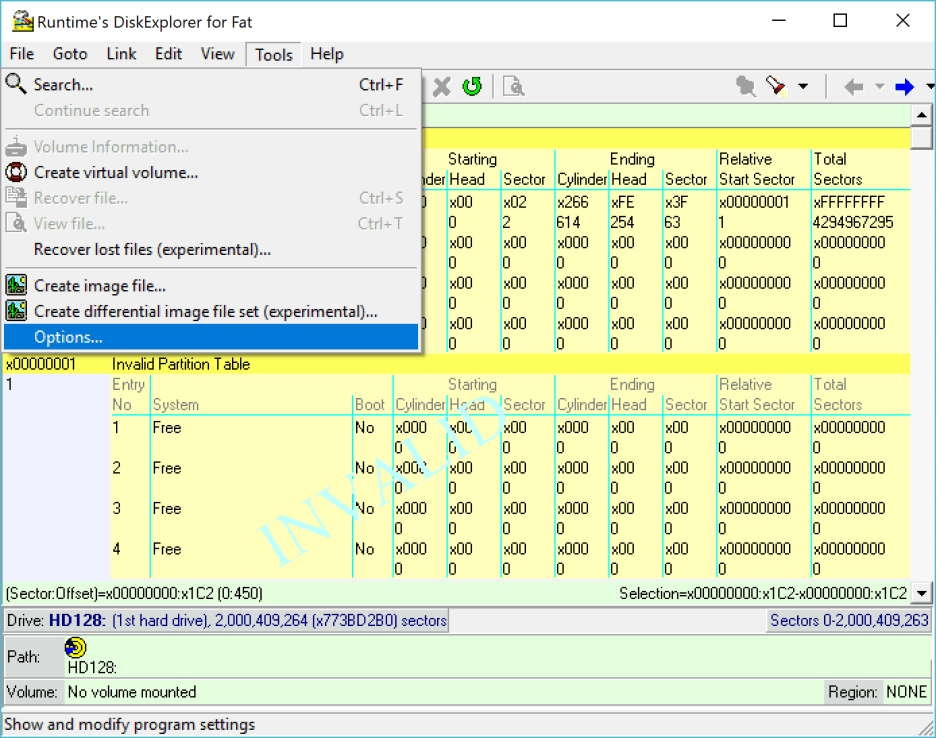
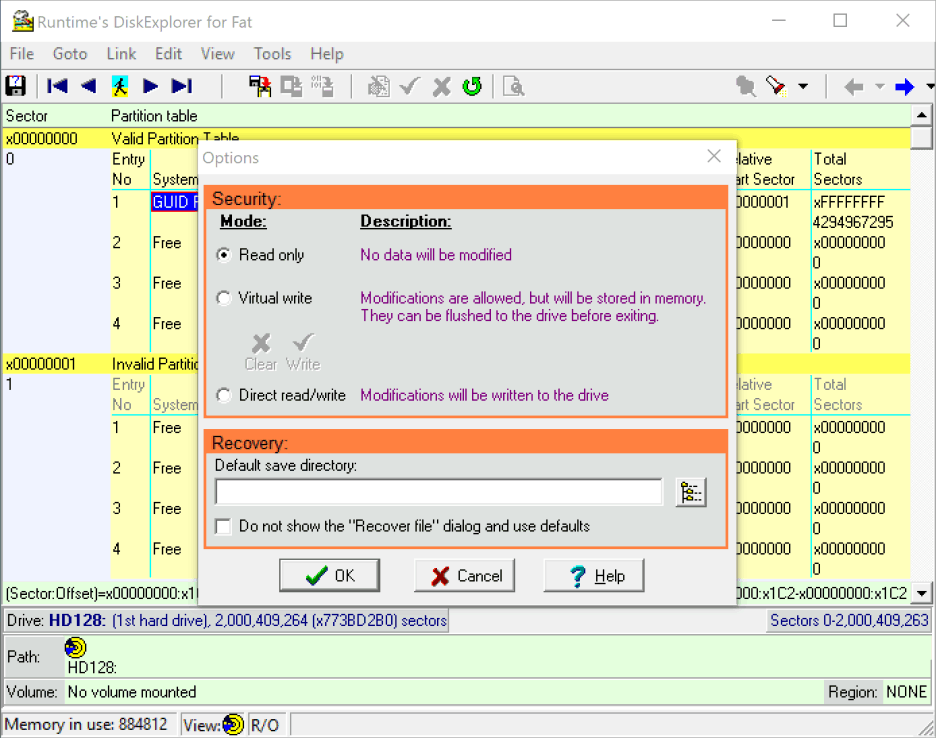
The first thing we do after starting up DiskExplorer is to enable its direct writing ability. This is usually disabled by default. To do this, click on "Tools—>Options".
2 Enable direct read/write
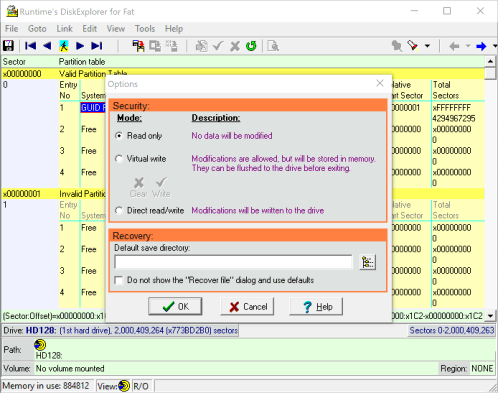
In the Options dialog, you see that the software is in "Read-Only" mode. Click on where it says "Direct read/write". That will allow you to write data to the drive directly. Once you have selected that option, click on Ok.
3 Go to "Select drive" dialog
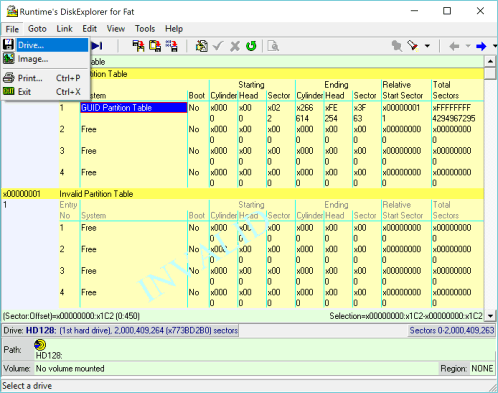
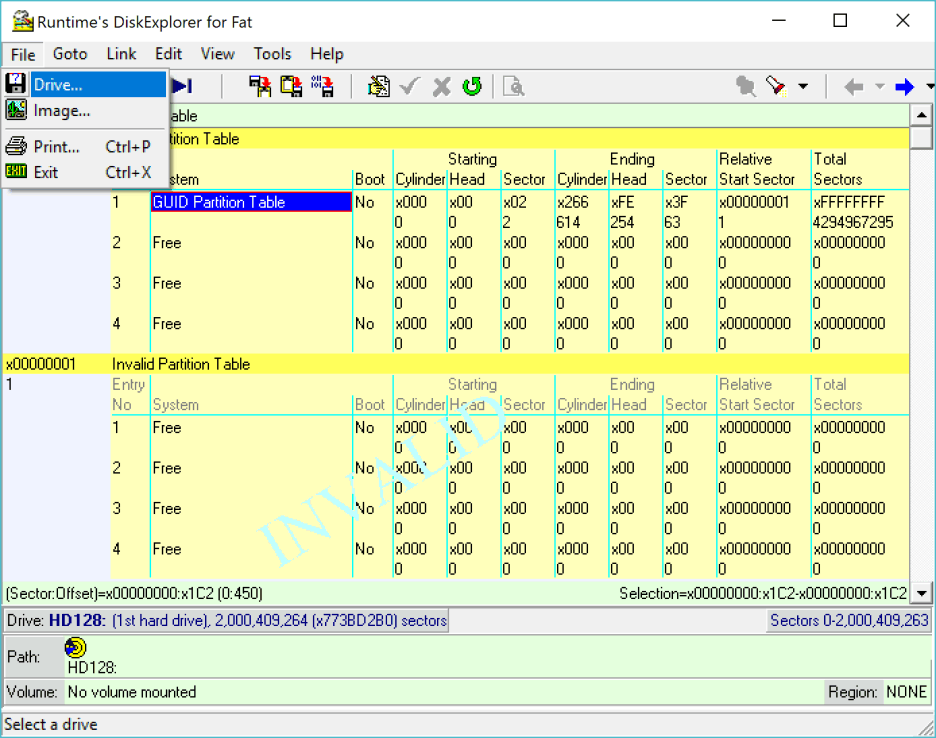
Go to "File—>Drive". You are going to pick the drive you are clearing sector 0 on.
Warning Everything on this drive will become inaccessible, so be sure you have the right drive, and no data on here is important.
Warning Also, you must not choose the drive that hosts the system partition C:, usually HD128.
4 Select the target drive
Select the drive you want to write the image to. Remember, all data will be lost on this drive. The drive you pick should be empty, meaning it should have no partition underneath.
5 Switch View to Hex
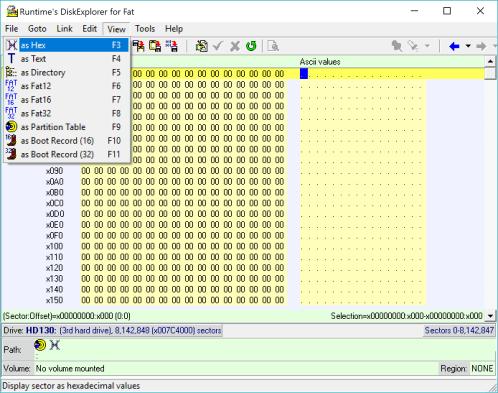
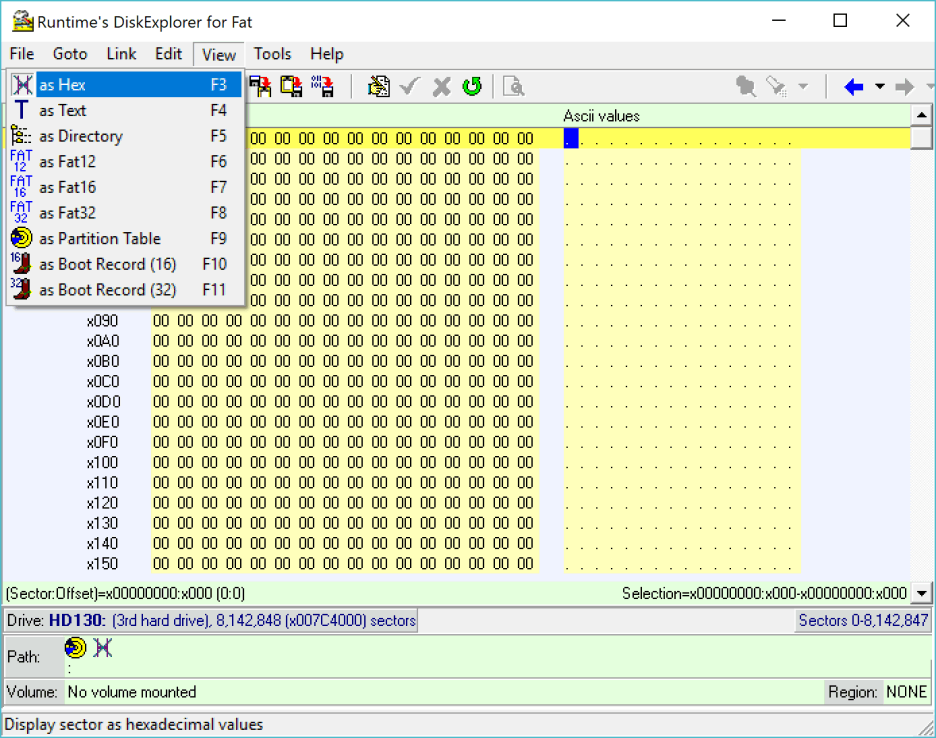
Click on "View—>as Hex" to change the display mode to hexadecimal. You can accomplish the same by pressing F3.
6 Mark sector 0
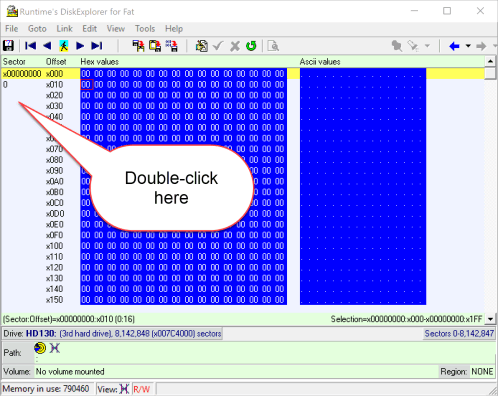
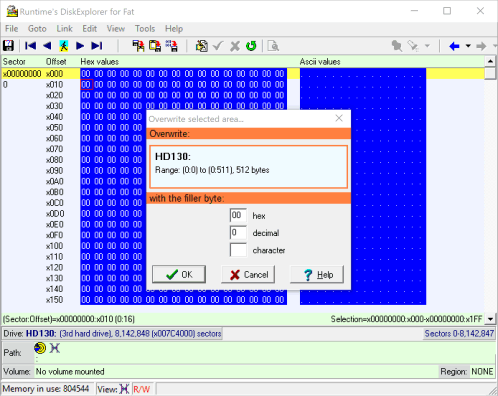
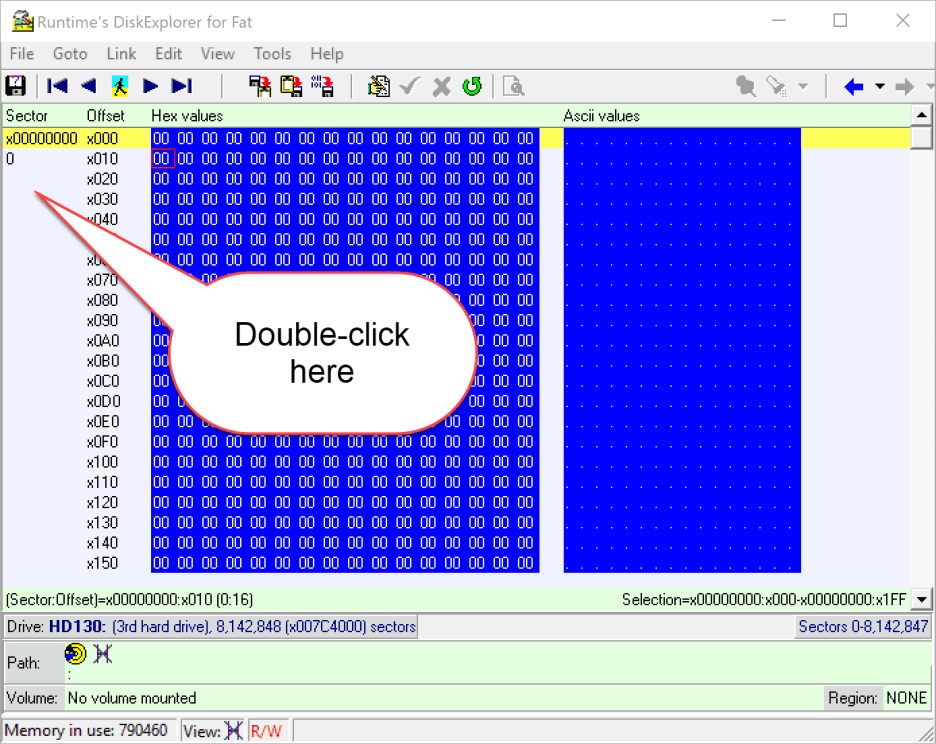
Double-click the space below the sector number 0 on the left-hand side. The entire sector should turn blue.
Critical Verify that the Selection in the right bottom corner shows exactly x00000000:x000-x00000000:x1FF
