How to Create an Image in GetDataBack
You can create hard drive images for data recovery purposes with GetDataBack, DiskExplorer, or RAID Reconstructor. These images are raw sector-by-sector drive clones. They have the extension .img if uncompressed, or .imc if compressed. Please note that DriveImage XML images (.dat, .xml) are NOT compatible with data recovery images.
1 Start GetDataBack Pro
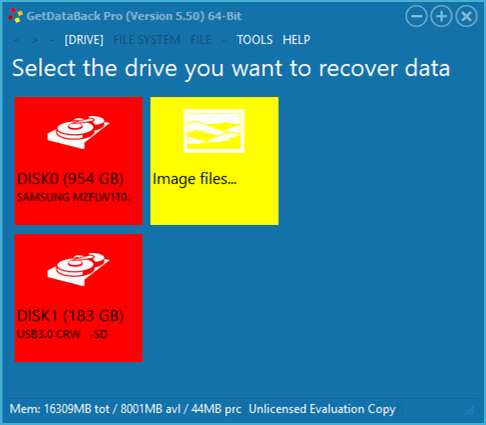
You see the drives available to you, DISK0 with 954 GB and DISK1 with 183 GB. If the drive you want to make the image of is not shown here, you need to check the cabling and, if necessary, your BIOS settings. If you do not get your drive to show up here, it might be too damaged.
2 Choose the drive to image
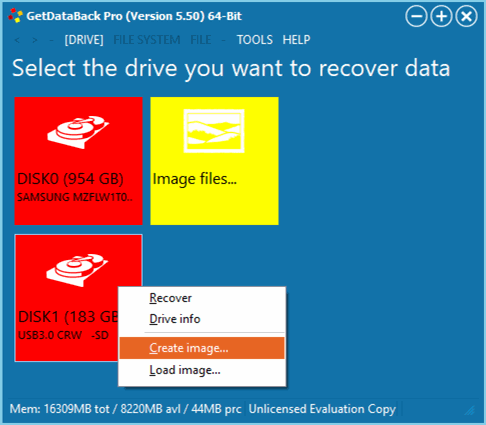
We want to image DISK1, which is a 183-GB SD card. Make sure you have enough disk space available to store this amount of data. Right-click the tile for DISK1 and click "Create image...".
3 Imaging dialog
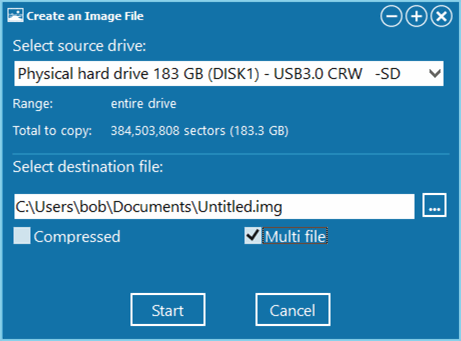
In the dialog box you just opened, you see the "Source drive", the "Range" and the "Total to copy". The "Source" should be the drive you selected in the previous step. The "Range" is the entire drive. The "Total to copy" is the size of the drive.
Please choose a destination file. This file is where the image will be stored.
Warning Never copy the image to the drive you want to recover from.
Click the three dots to the right of the destination, and it will bring up a file browser. Once you have selected a file name, you should select the "Multi file" checkbox. This option breaks the image into 650MB pieces, and if the drive is damaged, you will at least have a partial copy to work with.
Once this is done, click on "Start".
4 Image progress
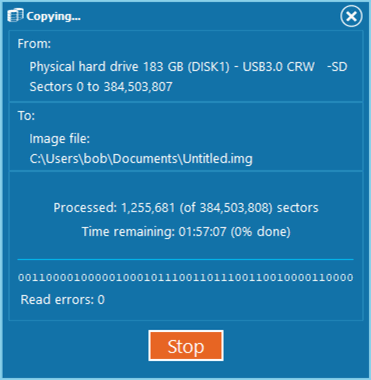
After GetDataBack Pro has started to create the image, you can observe the progress in the status window. The amount of time it takes depends on the size and speed of the drive and how fast your computer is.
Take note of the "Read errors" counter, as it should stay at 0. If it doesn't, there is not much you can do about it, but it informs you about the presence of physical drive damage.
After completion, you will have one big file C:\Users\..\Untitled.img that contains all the drive's data. If you had chosen the "Multi file" option, you see many more files, all 650 MB, and named Untitled.img, Untitled.001, Untitled.002, etc.


